This step by step tutorial will show you how to use .NET ReportViewer to create addressing labels, such as Avery addressing labels. I hope this tutorial will help someone who has the same problem as me.
Prerequisite:
- You have the correct data retrieved from database. I will not spend time on how to get your data from your database.
- This tutorial uses addressing label with size of 1” X 2-5/8”, three columns, 30 labels per sheet.
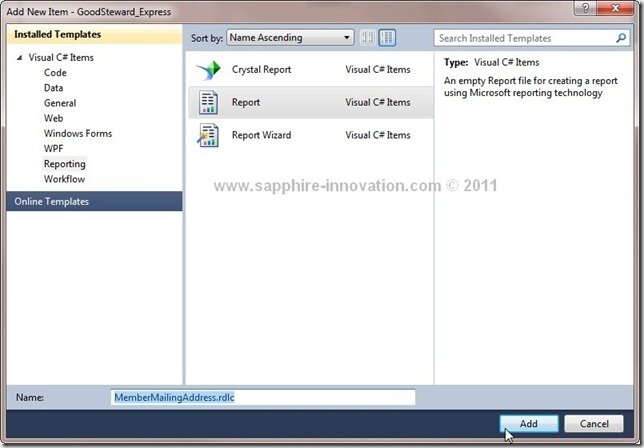
Firstly, create a Report file, it will be the data source for your ReprotViewer later. Right-click your project and select Add…—>New Item…, then choose Reporting from the Installed Template, then choose Report and give a name for the report, say MemberMailingAddress.rdlc
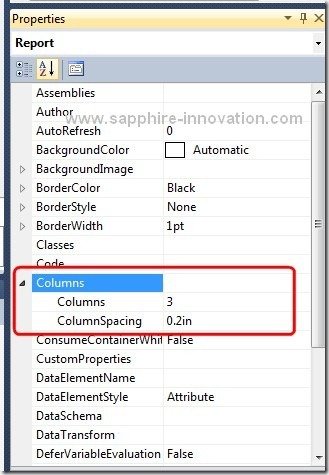
In the Report properties, set Columns = 3 and ColumnSpacing = 0.2in, and make sure the default page size is US Letter (8.5in X 11in)
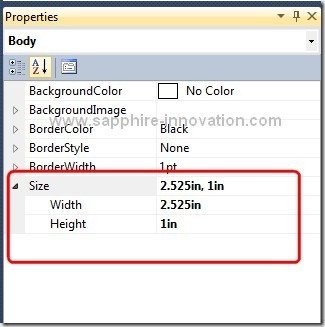
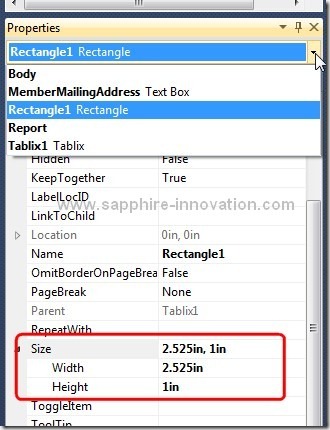
Now choose Body from the Properties window’s drop down list. In report, Body defines the actual size of the addressing label, so set Width=2.525in and Height=1in. The width I use here is little bit smaller than the actual width of the addressing label (2.625in), because there is 0.2in space between columns, also there is margin needs to be considered as well to make sure the total width will not exceed the actual page width 8.5in.
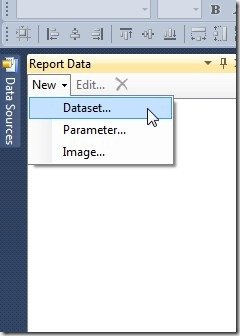
Now let’s add data to the Report. Click New at the top left corner and select Dataset.
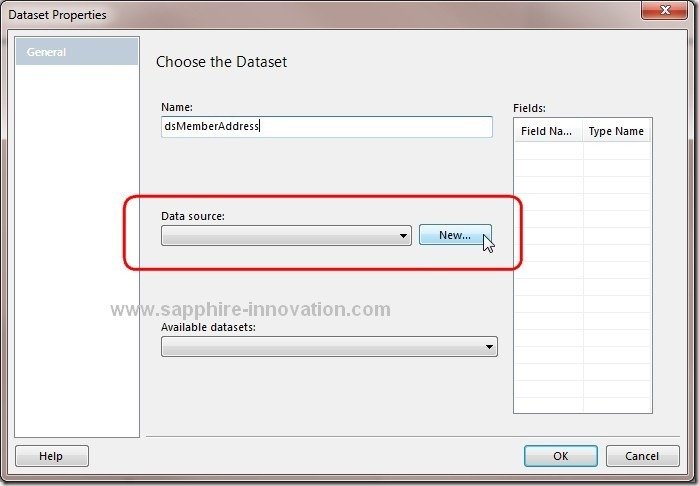
Give a name for the dataset, then click New button to add a new data source. If you already have the data source, then select it from the drop down list, then choose the dataset:
In my project, I populate a dataset with members mailing address called MemberMailingAddress. After you add your dataset, you can select the dataset from the left Report Data panel, and drag and drop it to the report on the right side. Your report will look like this:

Now you should see several new items in the Properties window: Rectangle1, Tablix1, Textbox1 (if you don’t assign names to them), and make sure their size will not exceed the Body size:
Now, add ReportViewer control to your page or Windows Form, then click on the smart tag (top right corner of the ReportView control) to choose the report we created above for the control. The rest part is easy, all you need to do is to populate the data source, then the report will display.
You will notice that the report will not display in 3-column format in the ReportViewer, it is a known issue with ReportViewer control. But if you click the Print icon in the report to print your result, you will find it is actually 3-column. Also, if you allow Export feature for the report, only the PDF format will give you nice 3-column report, the Word and Excel format will not, it is also a know issue.
Reference:


Thanks, a great help!
nice article. I may need some help though. i need the labels to be one per page as i am using a 58mm receipt printer
Thanks